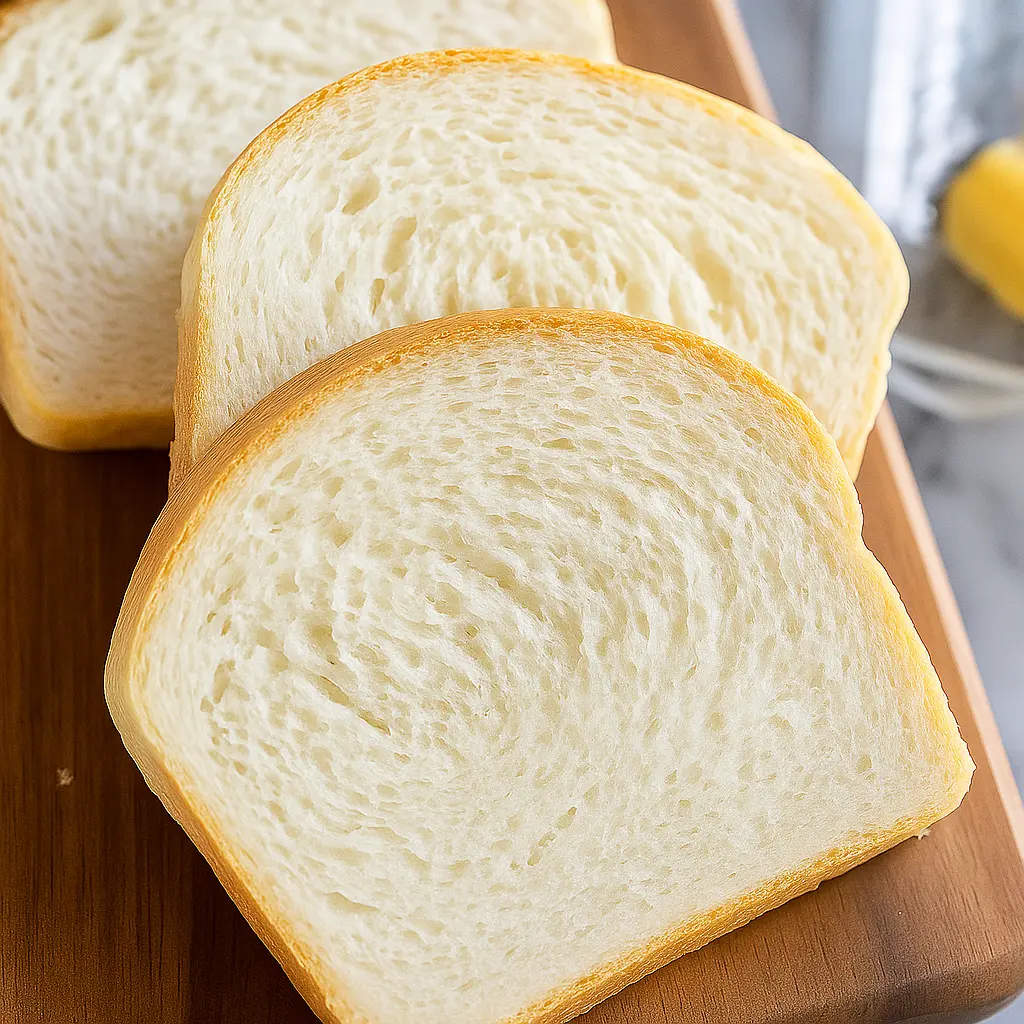
How to make homemade bread ,yet they create something truly special. At Benefits Recipes, we believe healthy food should be both delicious and easy to make. This no-fuss bread recipe uses just five pantry staples—no milk, no eggs, no special tools—and delivers a soft, flavorful loaf perfect for any day.
I’m the creator of Benefits Recipes, where each recipe is designed to support your well-being without sacrificing taste .No matter your baking experience, this guide offers clear, step-by-step tips to help you make the perfect loaf with confidence.. Let’s turn simple ingredients into something warm, nourishing, and satisfying.
Introduction to Homemade Bread Ingredients
What Makes Homemade Bread So Popular Today?
Homemade bread is having a serious comeback—and it’s easy to see why. It’s affordable, customizable, and incredibly satisfying to make. With rising food prices and an increasing interest in clean eating, more home cooks are turning to bread recipes that skip preservatives, additives, and processed extras.
Plus, the ingredients are probably already in your kitchen.
You don’t need anything fancy. In fact, this homemade white bread recipe uses just six basic ingredients: flour, water, yeast, salt, oil, and sugar (or honey). That’s it. And yes—it freezes beautifully and makes the best toast or sandwich base you’ve ever had.
Why Simplicity in Ingredients Matters
The fewer ingredients you have, the more important each one becomes. In store-bought bread, you’ll find a laundry list of chemicals and conditioners—most of which serve to extend shelf life or enhance texture artificially.
By sticking with real homemade bread ingredients, you control every aspect of the final product. You get better flavor, a fresher texture, and no unnecessary fillers. And even better—you know exactly what’s going into your body.
Homemade bread is also:
-
Budget-friendly
-
Perfect for batch cooking and freezing
-
Easily customizable (more on that later)
The Role of Pantry Staples in Everyday Baking
This recipe is truly a pantry hero. Let’s break down how each simple ingredient serves a purpose:
| Ingredient | Function | Substitution Options |
|---|---|---|
| Flour | Structure & base of the bread | All-purpose or bread flour |
| Water | Activates yeast, hydrates dough | No substitutes recommended |
| Yeast | Leavens the dough | Instant yeast with adjustment |
| Sugar/Honey | Feeds the yeast, adds mild sweetness | Brown sugar, maple syrup |
| Salt | Enhances flavor, controls yeast activity | Sea salt, kosher salt |
| Oil | Tenderizes crumb, keeps bread moist | Canola, vegetable, or melted butter |
With a few shelves of pantry basics, you can bake beautiful, delicious bread at home—without ever needing eggs or dairy.
The 5 Essential Ingredients in Bread : How to make Homemade Bread Ingredients ?
When you’re starting from scratch, understanding the homemade bread ingredients at their core is the first step to success. While some bread recipes call for 8, 10, or even more ingredients, the truth is: only five are truly essential. Get these right, and you’ll have a golden loaf every time.
Yeast: The Engine Behind the Rise
Yeast is the powerhouse of breadmaking. It’s a living microorganism that feeds on sugar and produces carbon dioxide, which gives bread its rise. For this recipe, active dry yeast is used—affordable, shelf-stable, and reliable when proofed properly.
Why it matters:
Without yeast, your bread won’t rise. It will be dense and flat. That’s why using fresh, properly stored yeast is crucial. Store it in the refrigerator after opening, and always check its expiration date.
Proofing tip:
Dissolve the yeast in warm water (105-115°F) with a pinch of sugar or honey. Let it sit for 5-10 minutes. If it bubbles and foams, your yeast is good to go.
Flour: Choosing Between Bread and All-Purpose
Flour is the structure of your loaf. This recipe allows flexibility: both all-purpose flour and bread flour work. Bread flour has a slightly higher protein content, which creates more gluten—ideal for chewy texture and good rise. All-purpose flour creates a softer crumb, which is great for sandwiches.
What to watch for:
-
Too much flour = dense bread
-
Too little = sticky dough that won’t hold shape
How to measure:
Spoon your flour into the measuring cup and level it off with a knife. Better yet, weigh it on a kitchen scale (aim for 500g–688g depending on humidity and altitude).
Water: Getting the Temperature Right
It seems simple, but water temperature can make or break your bread. If it’s too cold, the yeast won’t activate. If it’s too hot, it can kill the yeast.
Sweet spot:
Warm water between 105°F and 115°F is ideal for activating yeast. Always test it with a kitchen thermometer, especially if you’re new to baking.
Pro tip:
Use filtered water if possible. Tap water with high chlorine levels can inhibit yeast activity.
Salt: Small Amount, Big Flavor
Salt is your flavor enhancer—and it also helps regulate yeast activity. Without it, your bread will taste flat and can even overproof.
How much to use:
A couple teaspoons per batch is enough. Use kosher or sea salt for a cleaner taste.
Don’t mix with yeast directly:
Salt can kill yeast if added directly during the proofing stage. Always mix it with the flour or later in the process.
Sweeteners: Sugar vs Honey in Bread
The yeast needs a food source to grow—and sugar or honey feeds it just right. In this recipe, you can use either. Sugar is more neutral, while honey adds a warm, subtle flavor.
Best choices:
-
Granulated sugar
-
Raw honey
-
Maple syrup (as a vegan alternative)
Baker’s tip:
Using honey can also keep the bread moist longer thanks to its natural humectant properties.
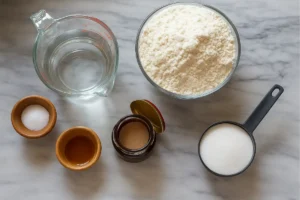
Understanding the Full List – The 8 Key Homemade Bread Ingredients
While the five core components are enough to make a successful loaf, many homemade bread recipes call for a few extras to boost flavor, texture, or shelf life. Let’s dive into the eight most common homemade bread ingredients and what each one contributes to your loaf.
Complete Ingredient List for Perfect Homemade Bread
This recipe is beloved for its simplicity, yet it’s versatile enough for customization. Here’s the complete list you’ll use:
| Ingredient | Purpose in Recipe |
|---|---|
| Warm Water | Activates yeast, hydrates flour |
| Active Dry Yeast | Leavens bread, gives rise |
| Sugar or Honey | Feeds yeast, adds mild sweetness |
| Salt | Enhances flavor, strengthens gluten |
| Oil | Tenderizes crumb, prevents dryness |
| Flour | Structure of the loaf |
| Optional: Butter | Softens crust and adds richness (for brushing) |
| Optional: Milk | Sometimes added for softer texture (not in this recipe) |
You can also add optional flavor enhancers like cinnamon, raisins, or garlic for variation, which we’ll cover in a later section.
The Science Behind Each Ingredient’s Role
Understanding why each ingredient matters helps you make adjustments and substitutions with confidence.
- Water isn’t just a liquid—it kickstarts the fermentation process and helps proteins and starches bind into dough.
- Yeast, as a living organism, converts sugars into gases, creating the air pockets that make bread fluffy.
- Sweeteners do double duty: they provide flavor and fuel for the yeast.
- Salt tightens the gluten structure and moderates yeast growth, preventing over-rising.
- Oil breaks down tough gluten strands and creates a more tender bite.
- Flour contains proteins that become gluten when mixed with water, forming the framework of the loaf.
Each of these homemade bread ingredients brings its own unique chemistry to the table.
Pantry Substitutions and What Works Best Running low on something? Here’s how to substitute smartly without compromising the quality of your loaf:
| Original Ingredient | Substitute | Note |
|---|---|---|
| Sugar | Honey, maple syrup | Adjust liquid ratio slightly if using honey |
| Oil | Melted butter, olive oil | Adds richer flavor |
| Bread Flour | All-purpose flour | Less chewy but still excellent |
| Active Dry Yeast | Instant yeast | Skip proofing, reduce rise time |
| Salt | Kosher or sea salt | Use the same amount |
This bread is very forgiving, and substitutions can open the door to new flavor profiles while staying true to the classic base.
Step-by-Step Guide to Making Bread from Scratch
Making homemade bread isn’t just a recipe—it’s an experience. This process might look long, but each step is simple and rewarding. Whether you’re using a stand mixer or mixing by hand, this step-by-step guide ensures a perfect loaf every time.
Let’s turn those homemade bread ingredients into a warm, fluffy, golden loaf.
How to Properly Proof Your Yeast
Proofing yeast is the first and most crucial step in your baking journey. It confirms that your yeast is alive and ready to do its job.
Steps to proof yeast:
- Pour 2 cups of warm water (105–115°F) into a large mixing bowl.
- Add 1 tablespoon of active dry yeast.
- Toss in a pinch of sugar or honey to feed the yeast.
- Wait 5 to 10 minutes. It should start bubbling and foaming.
If you don’t see any bubbles or activity, your yeast is dead. Start over with fresh yeast, or your bread won’t rise.
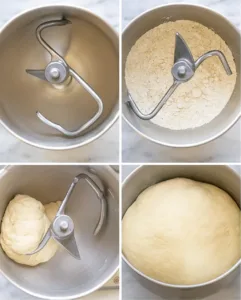
Mixing and Measuring Tips for Better Texture
Once your yeast is active, it’s time to build the dough.
- Add the remaining sugar/honey, salt, oil, and 3 cups of flour to the bowl.
- Mix gently with a wooden spoon or low-speed mixer setting.
- Gradually add another 1 to 2½ cups of flour, ½ cup at a time, until the dough pulls away from the bowl.
Important Tip: The dough should be slightly sticky—not dry or too soft. Don’t overload with flour or the loaf will turn out dense.
Tips for Kneading Dough Like a Pro
Kneading develops the gluten that gives bread its structure and chew. You can knead by hand or with a mixer:
- By mixer: Use a dough hook on medium speed for 5 minutes.
- By hand: Turn the dough onto a lightly floured surface and knead for 7–8 minutes. Push, fold, rotate. Repeat.
How to know it’s ready:
Your dough should be smooth and elastic. Press with a clean finger—it should bounce back.
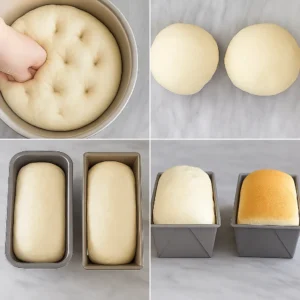
Understanding the First and Second Rise
The rise is where the magic happens. Your yeast eats, produces gas, and makes your dough grow.
First Rise (Bulk Fermentation):
- Grease a clean bowl.
- Place the dough inside, turn to coat with oil.
- Cover with plastic wrap or a damp towel.
- Let rise in a warm spot for 1½ hours or until doubled in size.
Speed-up tip:
Preheat your oven to 180°F, turn it off, then place the covered dough inside with the door cracked open. This creates a perfect warm environment for faster rising.
Second Rise (Proofing):
- Punch the dough down to remove air.
- Divide into 2 equal parts.
- Shape each into a log and place in greased loaf pans.
- Cover and let rise for another 45–60 minutes until the dough is 1 inch above the rim of the pan.
Baking Instructions:
- Preheat your oven to 350°F.
- Bake both loaves for 30–33 minutes, until golden brown.
- Tap the top—if it sounds hollow, it’s done.
- Turn out onto a wire rack. Brush tops with butter for shine.
Pro Storage Tip:
Once cooled, store in a sealed bag at room temperature for 2–3 days or refrigerate for up to 5 days.
This easy-to-follow process turns pantry staples into a professional-quality loaf. No fancy tools, no unnecessary steps—just real baking made simple.
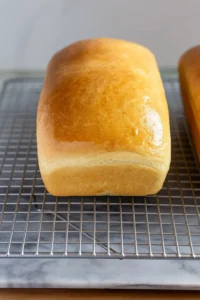
Homemade Bread Without a Bread Machine – Yes, You Can!
You don’t need fancy gadgets to make incredible bread. In fact, the original version of this recipe was made without a stand mixer or bread maker. It’s 100% hands-on—and just as good (if not better) than any machine-made loaf.
This is great news for anyone who wants to start baking with just a bowl, a spoon, and a little elbow grease.
Tools You Can Use Instead : “How to make Homemade Bread Ingredients”
Don’t own a bread maker? No problem. These simple kitchen tools are all you need:
- Large mixing bowl
- Measuring cups and spoons
- Wooden spoon or silicone spatula
- Loaf pans (9×5-inch recommended)
- A clean towel or plastic wrap
- Oven thermometer (optional but helpful)
These everyday tools are perfect for working with homemade bread ingredients and getting a reliable result.
Optional add-ons:
- Kitchen scale for more precise flour measurement
- Pastry brush (for buttering the crust)
Mixing by Hand vs Using a Stand Mixer
Mixing and kneading are two separate steps, and both can be done by hand with no issue.
Hand mixing tips:
- Mix wet and dry ingredients slowly to avoid flour clumps.
- Stir in flour gradually, watching for the dough to pull away from the sides of the bowl.
- Stop mixing when the dough becomes difficult to stir and transfer to a floured surface.
Hand kneading tips:
- Use the “push, fold, rotate” method for kneading.
- Sprinkle a small amount of flour as needed to prevent sticking.
- Knead until the dough is smooth and slightly tacky to the touch—usually 7–8 minutes.
With a stand mixer, the kneading time is cut in half, but the texture and result can be just as beautiful without one.
Bread Machine Modifications (If You Have One)
If you do have a bread machine, you can still use this recipe—just in smaller portions.
Bread machine adjustments:
- Cut all ingredient quantities in half to avoid overflow (most machines handle 1.5 lb loaves).
- Follow your machine’s instructions for the order of ingredients—usually liquids first.
- Choose the “Basic White” or “Sandwich” setting for best results.
- Remove the paddle after the last knead if possible to prevent holes in your loaf.
Pro tip: Even if your bread machine has a bake function, many bakers use it just for kneading and rising, then finish the bake in the oven for better crust and shape.
Troubleshooting Bread Dough Issues : “How to make Homemade Bread Ingredients“
Even the simplest bread recipes can run into bumps along the way. But the good news? Every baking mishap has a fix. Whether your dough didn’t rise, turned out too sticky, or feels like a brick, we’ll cover exactly what went wrong—and how to make it right.
Let’s troubleshoot the most common problems home bakers face when working with classic homemade bread ingredients.
Why Didn’t My Bread Rise? Common Fixes
The most common issue with homemade bread is a flat loaf. If your dough didn’t rise properly, the culprit is usually one of the following:
| Problem | Fix |
|---|---|
| Expired or inactive yeast | Always proof your yeast before mixing |
| Water too hot | Keep water between 105–115°F |
| Room too cold for rising | Use the oven proofing trick (turn oven off at 180°F) |
| Not enough rise time | Wait until dough doubles in size before shaping |
Pro Tip: Store yeast in the fridge after opening. Old yeast loses potency fast.
Overproofed vs Underproofed Dough
Proofing is where bread gains its volume and texture. But timing matters—too little or too much proofing can affect your loaf.
- Underproofed dough: Dense, gummy texture. The dough didn’t rise enough before baking.
- Overproofed dough: Collapses or flattens in the oven. The yeast exhausted itself before baking.
Fixing Sticky or Dry Dough Problems
Dough texture is everything. It should be soft, slightly tacky, and elastic—not dry or soaking wet.
Sticky dough?
- Lightly flour your hands and surface—don’t add too much flour to the dough itself.
- Rest the dough for 10 minutes; it often firms up on its own.
Dry, crumbly dough?
- Add a tablespoon of warm water at a time while kneading.
- Avoid scooping flour with the measuring cup—spoon it in and level it off.
Humidity and altitude play a big role in dough consistency. Always go by feel, not just measurements.
Why Is My Bread Dense or Heavy?
Dense bread often means gluten wasn’t fully developed or the dough was overworked.
Common causes:
- Too much flour: Use the least amount needed until the dough pulls away from the sides.
- Under-kneading: You need at least 5–8 minutes of kneading to build structure.
- Overproofing: Weakens gluten, causing collapse during baking.
Simple solution:
Stick with the base recipe and trust the texture indicators—your dough should feel like soft playdough, not dry or rubbery.
What If My Bread Is Too Bland? Flavor issues are usually tied to salt or fermentation.
- Add enough salt—it enhances every other flavor.
- Extend your first rise (fermentation) for deeper flavor.
- Use honey instead of sugar for a richer taste.
Even with only six homemade bread ingredients, there’s a ton of room to develop great taste. Small tweaks make a big difference.
Make-Ahead & Freezer-Friendly Bread Techniques
One of the best things about working with basic homemade bread ingredients is how flexible they are. Whether you’re baking for the week, prepping for a party, or just want fresh bread on demand, you can absolutely make bread ahead of time or freeze it—without sacrificing quality.
Let’s explore how to store dough, freeze baked loaves, and reheat your bread like it just came out of the oven.
How to Freeze Dough Before Baking
Freezing unbaked bread dough is a great way to save time. You do most of the work upfront, then bake fresh whenever you’re ready.
Steps:
- Prepare the dough through step 6 (shape the loaves).
- Place the loaves into disposable or freezer-safe bread pans.
- Cover tightly with a double layer of foil.
- Label and freeze for up to 3 months.
When ready to bake:
- Remove from freezer and let thaw at room temperature for about 5 hours.
- Let it rise (second proofing) until dough is 1 inch above the pan.
- Bake as directed at 350°F.
Pro Tip:
Use foil to wrap loaves tightly, keeping air out. Freezer burn ruins texture fast.
How to Freeze Baked Bread for Freshness
Freshly baked loaves can also be frozen for future meals. Perfect if you like to batch cook or avoid food waste.
Steps:
- Allow bread to cool completely after baking.
- Place each loaf in a resealable freezer-safe bag.
- Press out excess air, seal, and freeze for up to 3 months.
To thaw:
- Let the bread sit at room temperature in its bag.
- You can also slice the loaf before freezing, then reheat individual slices in a toaster or oven.
Optional:
Wrap in parchment paper before bagging to preserve crust quality.
Thawing and Reheating Tips for Perfect Texture
Proper reheating brings back the soft crumb and crisp crust—almost as if it was just baked.
Whole loaf reheating:
- Thaw bread at room temperature, then warm in a 350°F oven for 8–10 minutes.
- Brush the crust with melted butter for shine and softness.
Sliced bread reheating:
- Use a toaster for crispy edges.
- Heat slices in the oven wrapped in foil to keep them soft.
Avoid:
Microwaving whole loaves—it softens the crust and gives an odd texture.
Make-Ahead Dough Storage in the Fridge
If you want to prep today and bake tomorrow, you can refrigerate your dough before the first rise.
Instructions:
- Prepare dough as usual through mixing and kneading.
- Place in a large greased bowl, cover tightly.
- Refrigerate for up to 24 hours.
- Remove, bring to room temperature, and continue from the first rise step.
This slow fermentation also enhances the flavor. Think of it like a secret weapon for deep, rich taste.
Delicious Homemade Bread Variations
Once you’ve mastered the base recipe with simple homemade bread ingredients, you unlock a world of possibilities. From sweet breakfast loaves to savory dinner rolls, the same dough can take many forms—all with just a few tweaks.
Let’s explore the most popular and foolproof bread variations you can make at home.
Cinnamon Swirl Bread
Sweet, cozy, and full of flavor, cinnamon swirl bread is perfect for breakfast or dessert.
How to make it:
- After the first rise, roll out each dough portion into a large rectangle.
- Mix ¼ cup sugar with 2 teaspoons ground cinnamon.
- Sprinkle evenly over the dough, leaving a 1-inch border.
- Roll the dough tightly into a log and place seam-side down in greased loaf pans.
- Let rise, then bake as usual.
Serving suggestion:
Slice and toast with butter, or use it for indulgent French toast.
Raisin Bread and Other Sweet Loaves
Dried fruits take your basic dough to a new level without needing extra equipment or ingredients.
For raisin bread:
- Mix 1 to 1½ cups of raisins into the dough during the kneading stage.
- Combine with cinnamon swirl instructions above for an extra punch of flavor.
Other great add-ins:
- Chopped dried apricots
- Cranberries
- Chopped nuts (walnuts, pecans)
From Dough to Rolls, Breadsticks & Pizza Crust
This dough isn’t just for loaves—it’s a shape-shifter. Here’s how you can get creative:
| Variation | Instructions |
|---|---|
| Dinner Rolls | Divide dough into small balls, place in a greased pan, rise & bake 20 mins |
| Breadsticks | Roll into logs, brush with butter, sprinkle garlic or herbs, bake until golden |
| Pizza Crust | Roll out thin, pre-bake at 450°F for 5–7 minutes, add toppings, then finish baking |
Looking for inspiration? Try Sourdough Discard Recipes to experiment with more bread-based ideas.
Whole Wheat & Artisan Bread Tips
Want a heartier, healthier loaf? Whole wheat bread is a great variation—just don’t substitute it 1:1 for all-purpose flour.
Tips:
- Use 50% whole wheat flour and 50% all-purpose to maintain lightness.
- Add a tablespoon of vital wheat gluten for better rise.
- Increase liquid slightly—whole wheat absorbs more moisture.
For an artisan twist:
- Bake inside a preheated Dutch oven to create steam and a crisp crust.
- Score the top with a sharp blade for that rustic look.
Best Ways to Use Leftover Bread: “How to make Homemade Bread Ingredients”
Homemade bread is at its peak on day one—but that doesn’t mean it loses value as it ages. In fact, slightly stale bread opens the door to new, delicious possibilities. If your loaves start to dry out after a few days, don’t toss them—transform them.
Let’s walk through creative and tasty ways to repurpose leftover bread using the same base of homemade bread ingredients.
Turn Bread into French Toast or Bread Pudding
Day-old bread is ideal for soaking up custard without falling apart. It’s the secret to the best brunch bakes.
Ideas:
- Classic French Toast
Slice the bread thick, dip in a mixture of eggs, milk, vanilla, and cinnamon, then fry until golden. - Overnight French Toast Casserole
Cube stale bread and layer it in a baking dish with sweet custard. Let it sit overnight, then bake the next morning. - Bread Pudding
Combine cubes of leftover bread with milk, eggs, sugar, and your favorite mix-ins (like raisins or chocolate chips), and bake until golden and custardy.
Don’t miss our 7 Surprising Benefits of Cottage Cheese Banana Bread for another delicious use of bread-like textures in desserts.
Making Bread Crumbs or Stuffing Cubes
Transform your dry slices into pantry staples that save money and elevate meals.
To make bread crumbs:
- Dry the slices fully—either air dry for 1–2 days or bake at 250°F for 15 minutes.
- Pulse in a food processor until fine.
- Store in an airtight jar or freezer bag.
To make stuffing cubes:
- Cut bread into small cubes.
- Bake until completely dry.
- Store until ready to use in stuffing or casseroles.
Casserole Recipes That Use Day-Old Bread
Stale bread is perfect for soaking up savory flavors in hearty, baked dishes. These easy meals give leftovers a second life.
Ideas:
- Breakfast Strata
Combine bread cubes with eggs, cheese, and sausage or vegetables. Let sit overnight, then bake in the morning. - Savory Bread Casserole
Layer chunks of bread with cooked onions, spinach, cheese, and broth. Bake for a comforting, filling dish. - Stuffed Peppers or Mushrooms
Use bread crumbs as the binder for savory stuffing mixtures.
Homemade bread doesn’t need to be eaten all at once. With a little creativity, you can stretch every last slice into something new, delicious, and useful—just like the versatile homemade bread ingredients that started it all.
Conclusion: “How to make Homemade Bread Ingredients”
Baking bread from scratch doesn’t have to be complicated or intimidating. With just a few homemade bread ingredients, you can create a loaf that’s warm, fluffy, flavorful, and absolutely foolproof—even if you’re a total beginner.
You’ve now got a clear understanding of:
- The five essential ingredients that form the foundation of any great loaf
- How to troubleshoot dough issues like a pro
- Ways to make your recipe ahead, freeze it, and store it for future meals
- Creative variations from cinnamon swirl to whole wheat
Frequently Asked Questions About Homemade Bread Ingredients
What ingredients do I need for a bread maker?
You’ll use the same basic ingredients: water, flour, yeast, salt, oil, and sugar or honey. The order of ingredients may vary depending on the machine, but the bread maker handles the mixing, rising, and baking for you.
What are the 8 ingredients in bread?
While most recipes stick to six, many expand to eight by including butter, milk, or eggs. However, this recipe keeps it simple with pantry staples and no dairy or eggs required.
What are the 5 essential ingredients in bread?
The essential five are yeast, flour, water, salt, and sugar (or honey). These basics create the chemistry needed for dough to rise and bake into a soft, flavorful loaf.
What ingredients are used to make bread?
